How does affiliate marketing work?
Affiliate marketing is a kind of marketing where businesses reward affiliates for visitors they send to the business’s site via the affiliate’s own marketing efforts. An affiliate system is the system that handles the affiliate accounts, the tracking of the traffic affiliates have sent to the site, and the monetary rewards the affiliates have earned for their efforts.
This diagram helps to illustrate how the system works:

Installing AffiliateWP
When you purchased AffiliateWP you were given a download link on both the purchase confirmation page, and in your purchase receipt email. Download AffiliateWP by clicking on either of these 2 links. You will be given a .zip file which you will upload to WordPress in one of two ways, which are noted below.
From the WordPress admin dashboard
1In your WordPress admin, go to Plugins → Add New2Click Upload Plugin3Click Choose File and select the zip file that you downloaded when you purchased AffiliateWP4Click Install Now5If successful, click Activate Plugin to activate it, or Return to Plugin Installer for further actions.
By FTP (File Transfer Protocol)
1Extract the .zip file you received when you purchased AffiliateWP. This is usually done by right-clicking on the .zip file and selecting “extract” or similar2Log in to your site via FTP and navigate to the wp-content/plugins folder3Upload the extracted folder from step 1 into the plugins folder4In your WordPress admin, go to Plugins5Find AffiliateWP and click activate
Enabling your chosen integration
AffiliateWP integrates with numerous popular 3rd-party WordPress plugins for eCommerce, memberships and subscriptions, form-builders and more. Once you have installed AffiliateWP it’s incredibly easy to enable your chosen integration from the WordPress admin. Follow the below steps to enable your chosen integration.1In your WordPress admin go to the Affiliates → Settings → Integrations tab2Check the box or boxes next to the integrations you will be using with AffiliateWP

3Click Save Changes to enable your chosen integration(s).
That’s it! You can now configure your integration to your liking to enable referrals, set per-product rates, and more. Read more on how to set up your specific integration by checking out its corresponding documentation.
It isn’t necessary to enable all integrations. Whether you’re just using one, or you are using a few, you only need to enable the integration(s) you will be using.
Affiliate Area Overview
The affiliate area is where your affiliates log into their account and view their referral stats, generate affiliate links, and view their earnings.
AffiliateWP will automatically create a page called Affiliate Area when it is first installed on the site, and it will also populate this page with the proper shortcode, which is [affiliate_area].
If AffiliateWP did not automatically create the page, or you simply wish to name it something different, create a standard Page in WordPress and place the [affiliate_area] shortcode in the main content.
Make sure that you have selected the page you wish to act as the affiliate area in Affiliates → Settings:

The Affiliate Area is divided up into multi sections:
Affiliate URLs

When an affiliate enters a URL into the Page URL field and clicks Generate URL, their affiliate ID or username is automatically appended:

Statistics

Graphs

Referrals

Visits

Creatives

Settings
Setting the referral URL variable
The referral URL variable is the parameter that gets added to URLs on your site to identify them as referral URLs of a specific affiliate.
You can set the referral variable to anything you wish, though AffiliateWP will default to using ref.
Note: When setting your referral variable, make sure you do not use a reserved keyword or term in WordPress as it may conflict with core functionality. Example: “p” which is reserved for pages and posts. View this link for the complete list: https://codex.wordpress.org/Reserved_Terms.
A URL that contains a referral var will look typically look like this: http://yoursite.com/?ref=422
422 is the ID of the affiliate the URL belongs to. In addition, your affiliates can use any of the following affiliate URLs.
The referral variable can be set in Affiliates → Settings→ General:

Note: If you change your referral variable, don’t forget to let your affiliates know.
Setting referral rates
Setting a global (default) referral rate
The referral rate determines how much the affiliate earns on each sale they generate for the store. For example, if an affiliate generates a $100 sale, their referral amount for the sale will be a percentage of that.
If the referral rate is set to 20%, affiliates will receive $20 on a $100 order.
The global referral rate (which will apply to all affiliates) is set in Affiliates → Settings:

Setting a per-affiliate referral rate
If you wish to set a custom rate for a specific affiliate, go to Affiliates → Affiliates, search for the affiliate by name or ID and click on their name:
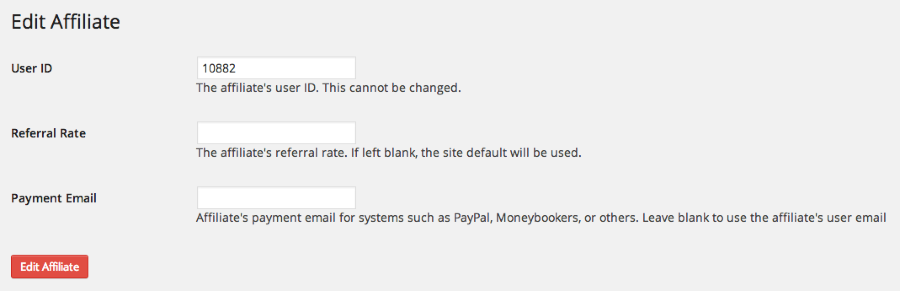
Enter the Referral Rate you would like that specific affiliate to earn. Setting a referral rate on a per-affiliate basis will override all other referral rates.
Setting a per-product referral rate
Referral rates can also be set on a per-product basis (for some eCommerce plugin integrations). For per-product referral rates, see the setup documentation for the ecommerce or membership plugin you are using in the Integrations section.
Note: If an affiliate has a custom rate specified for their account, that rate will always take precedence over global and per-product rates.
Setting per-product, tiered, lifetime, or recurring referral rates
Several add-ons can also adjust how referrals rates are calculated.
- Set per-product, per-affiliate referral rates with the free Affiliate Product Rates add-on: Setting up Affiliate Product Rates
- Set tiered referral rates to incentivize your affiliates with the Tiered Affiliate Rates pro add-on: Setting Tiered Affiliate Rates
- Set lifetime refrral rates that allows your affiliates to receive commission on all future purchases made by a linked customer with the Lifetime Commissions pro add-on: Setting Lifetime Commission Rates
- Set recurring referral rates for subscription services and recurring customer payments with the Recurring Referrals pro add-on: Setting up Recurring Referrals
Enabling affiliate registration
When AffiliateWP is installed and activated, it will automatically create a new page on your WordPress site titled Affiliate Area. The Affiliate Area is where your affiliates log into their account and view their referral stats, generate affiliate links, and view their earnings.
On the Affiliate Area page, whilst existing affiliates can log in to view their statistics, potential affiliates can also register to become a new affiliate on your site. AffiliateWP ships with a useful affiliate registration form, so you can start recruiting affiliates as soon as you’re ready to launch. This registration form is not enabled by default, so you can plan and set up your affiliate program before you start allowing affiliate registrations.

When you’re ready, it’s incredibly easy to enable the affiliate registration form and make it visible on your Affiliate Area page:
- Go to Affiliates → Settings → General.
- Click on the Misc tab.
- The first option on the Misc tab is Allow affiliate registration – tick the checkbox next to this option:

- Click Save Changes.
The default affiliate registration form will now be visible on your Affiliate Area page. Note: There is a Require Approval option that can be enabled in Affiliates → Settings → Misc that makes all affiliate registrations be created in a Pending status until someone clicks to Approve or Reject.
Adding new affiliate accounts
Adding new affiliates to the system, so that they can use their referral links and gain referral earnings, is simple. Site admins can add affiliates manually, or (if enabled) affiliates can register accounts themselves. Affiliate accounts are tied directly to user accounts in the WordPress user database.
Adding New Affiliates Manually
If the affiliate that you are creating an account for does not already have a WordPress user account on your site, first go to Users → Add New and create the user account. Once the user account is created, the user can be registered as an affiliate.
To register an existing user account as an affiliate, go to Affiliates → Affiliates and click the Add New button at the top of the screen:
You will be presented with a form that looks like this:

In the user field, begin typing the name, email, or login name of the user account you wish to register as an affiliate. A list of users will be shown matching the partial name you have entered:

Simply click on the user account that you are registering as an affiliate. If you do not receive a match, you will see a message noting this as well as a User email field will appear. This allows you to register the new affiliate as a new WordPress user as well while remaining on this screen:

Optionally, you can set the affiliate’s payment email, referral commission rate and type, and add notes about the affiliate if desired. The payment email will be used in the referral payout file and is generally associated with an affiliate’s PayPal (or similar) account. Finally, you can check the box to prevent the affiliate application acceptance email from being sent out with the manual registration.
Referral Rate and Referral Type
The referral commission rate is the amount the affiliate will earn on each successful referral. You can also set the referral type if you would like a different setting (percentage vs flat rate) than what you have in the global settings in Affiliates → General. For example, if this is set as a percentage, and you wanted to give the affiliate 20% of every successful sale their affiliate links generated, you would enter 20 here. You do not have to set either of these if you wish your affiliates to have the global rate amount and rate type.
Add New WordPress User
Affiliate accounts can also be registered when manually creating WordPress user accounts on your site under Users → Add New by ticking the Skip Confirmation Email checkbox, and ticking the Add as Affiliate checkbox:
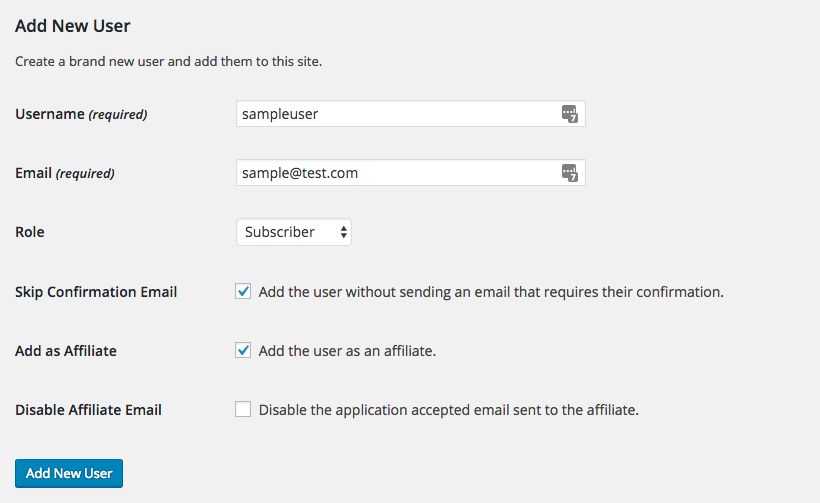
You can also choose to disable the “Affiliate Application Accepted” email which is sent to the affiliate if you are adding their account manually from this screen.
Note: The Add as Affiliate and Disable Affiliate Email checkboxes will only show when you check the Skip Confirmation Email box, and if you do not have Auto Register New Users enabled in Affiliates → Settings → Misc. If you have the Auto Register New Users setting enabled, the affiliate account will be automatically created when you create the new user account.
If you wish to convert an existing user account to an affiliate, this can also be done from the user’s Edit screen. Simply click the Register button under the AffiliateWP section section as shown here:

Once the user has been added as an AffiliateWP affiliate, some additional helpful items will be shown in this area. The registration status will change to Active, plus you will see button links to that affiliate’sReports and their Edit Affiliate page:

Allow Affiliates to Register Themselves
If you would like to allow affiliates to register themselves, first enable affiliate registration in the Misc settings tab:

Once you have done that, a registration / login form will be shown in the Affiliate Area. Also, in the Misc settings section is an option to set whether affiliate registrations must be moderated by site admins:

If Require Approval is enabled, affiliates will be registered with a Pending status and a site admin will then need to accept or reject them from the main Affiliates page in the WordPress admin. Site admins will receive an automated email anytime an affiliate registers.
Auto Registering New Users
Users can be automatically registered as affiliates by enabling the Auto Register New Users option shown here:

This is useful if you intend to import a large number of user accounts, or WordPress user registration is enabled on your site.
Note: If you have imported users and do not want them to receive an affiliate approval email when they are approved, we have a code snippet available, for developers to implement, that you can temporarily enable.
Generating affiliate accounts for all existing WordPress user accounts
Another alternative is to create affiliate accounts for all of your existing WordPress user accounts. If you’d like to do that, you can do so by visiting Affiliates → Tools → Migration Assistant → User Accounts → select desired roles → click on the Create Affiliate Accounts for Users button asshown here:

Use this tool to create affiliate accounts for each of your existing WordPress user accounts that belong to the selected roles above the Create Affiliate Accounts for Users button.
Note: Users that already have affiliate accounts will be skipped. Duplicate accounts will not be created.
Adding Affiliate Notes
As of AffiliateWP 2.0, you can add private notes to any affiliate account. Affiliate notes are visible only to site administrators. This could be used for:
- Promotion methods if the affiliate has been manually added.
- To store any specific payout information.
- Storing additional website URLs where the affiliate promotes the site owner’s website, other than the primary URL.
- Storing additional links to social media accounts.
- Storing the affiliate’s private contact details, such as a phone number.
- Making notes regarding the affiliate of which other site admins should be aware.
- Making personal notes regarding the affiliate.
The possible uses are almost endless!
To add a note for an affiliate, go to the Affiliates → Affiliates screen, and click edit for the desired affiliate. At the bottom of the affiliate’s account screen, enter notes in the Affiliate Notes field:

Affiliate creatives and banner images
Creatives are pre-made banners and assets that affiliates can use to easily promote your products or services. Instead of requiring that affiliates create their own banner images or affiliate URLs, you can make it easy for them by setting up a list of pre-made banner images of various sizes, or text links, that they can simply add to their own websites or email newsletters.
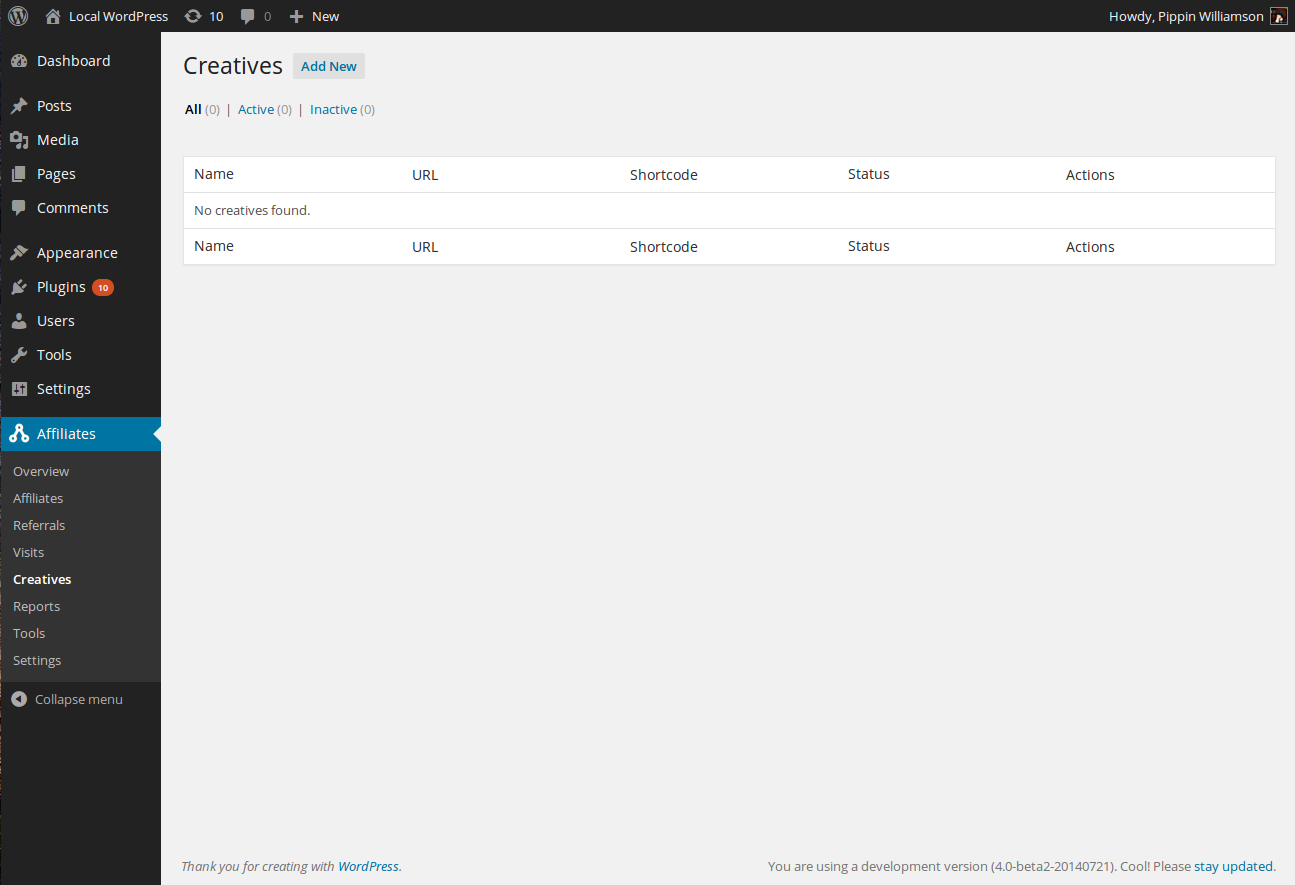
The Creatives are managed through the Creatives option under the main Affiliates menu in the WordPress admin:
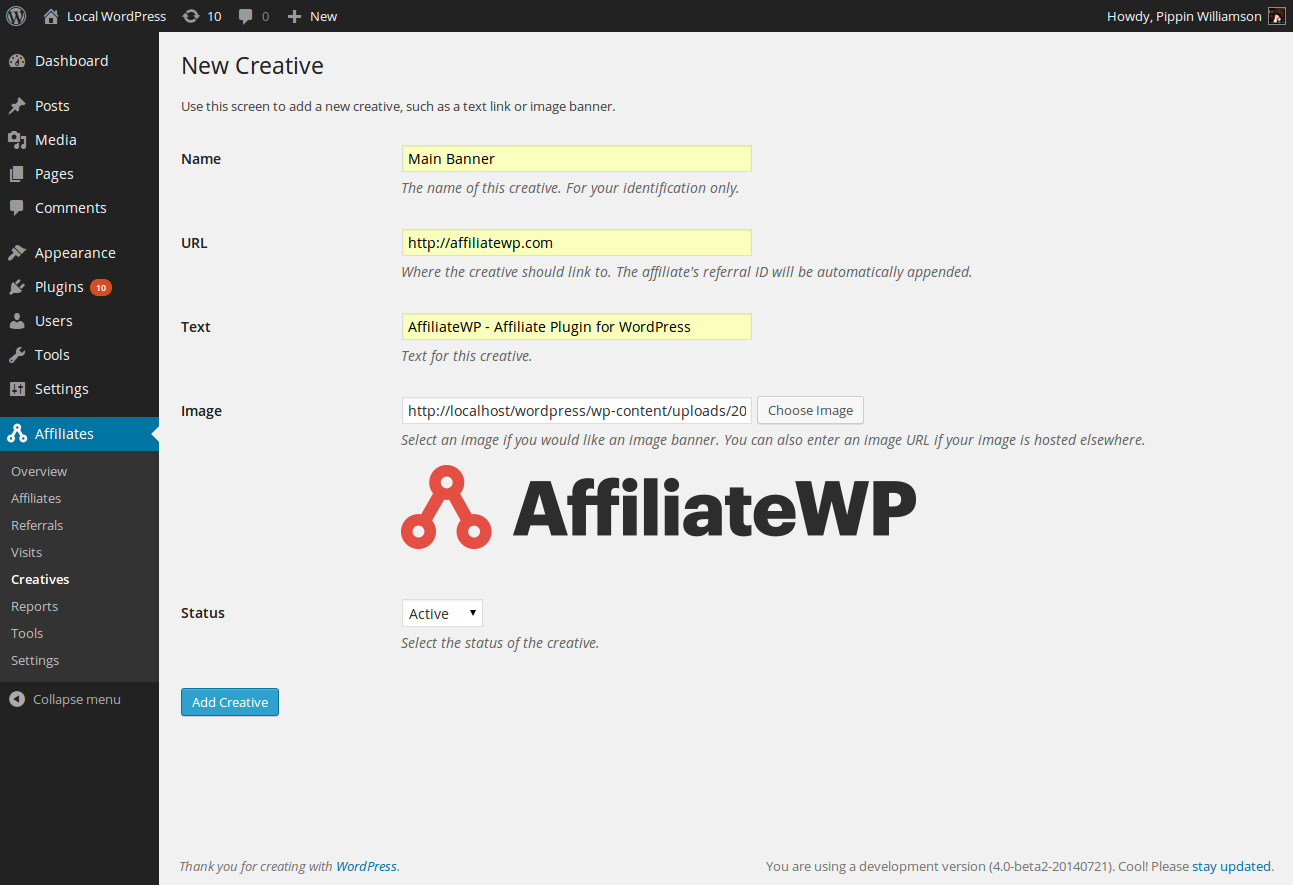
To create a new creative, click the Add New button at the top of the screen:
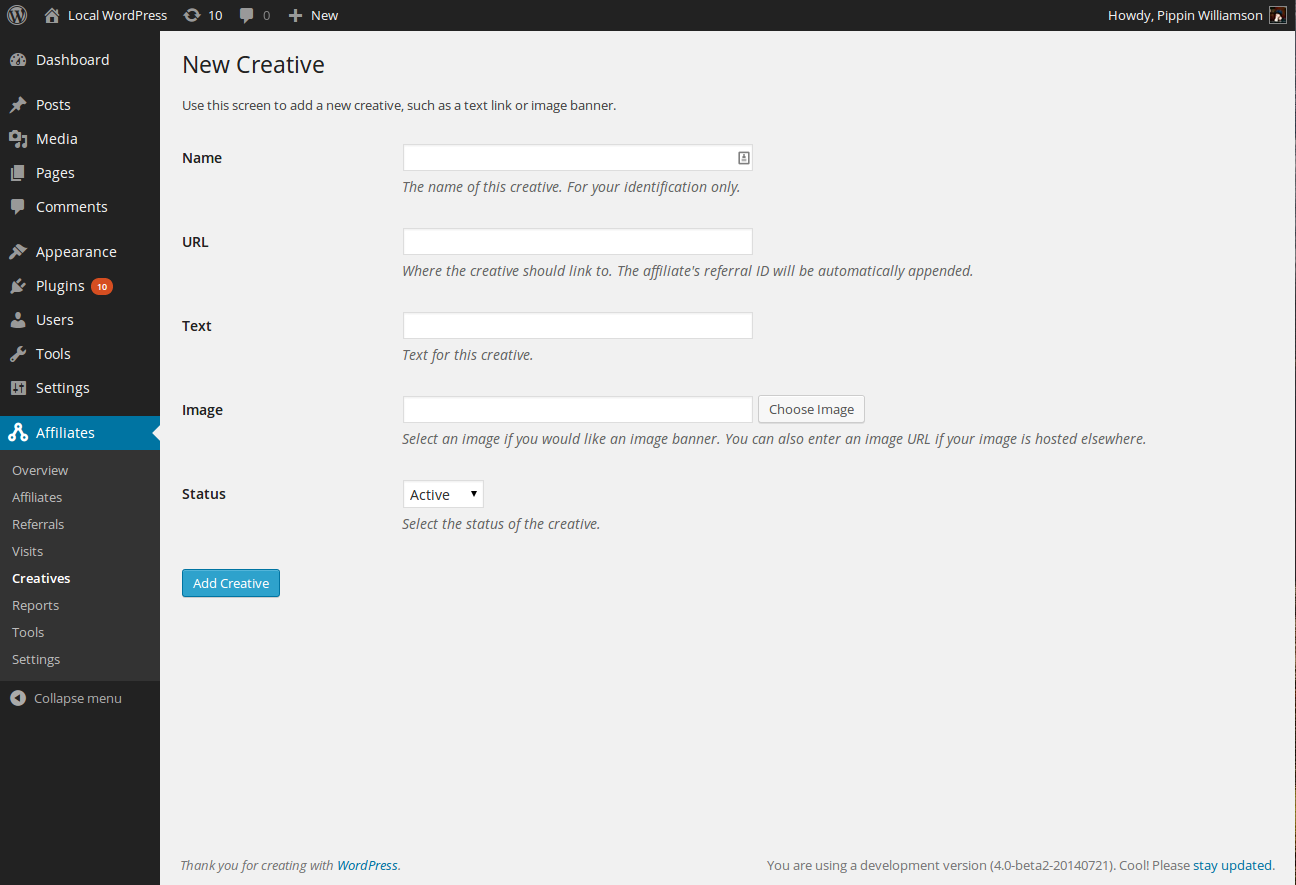
You will be presented with a simple form to fill out.
- Name – this is a name given to the creative for administrative purposes only
- URL – this is the URL that the creative will link to
- Text – this is the text that is displayed beneath the image
- Image – this is the full URL to the image file to use (if you wish to create a text-only creative, simply skip this step)
- Status – this is the status of the creative. Active means it can be seen by affiliates; Inactive means it is hidden.
TIP: To create a text only link for your affiliates to share, simply do not upload an image; the text link will still show in the Creatives tab of the affiliate area.
Once you have created the creative, it will be shown in the list:
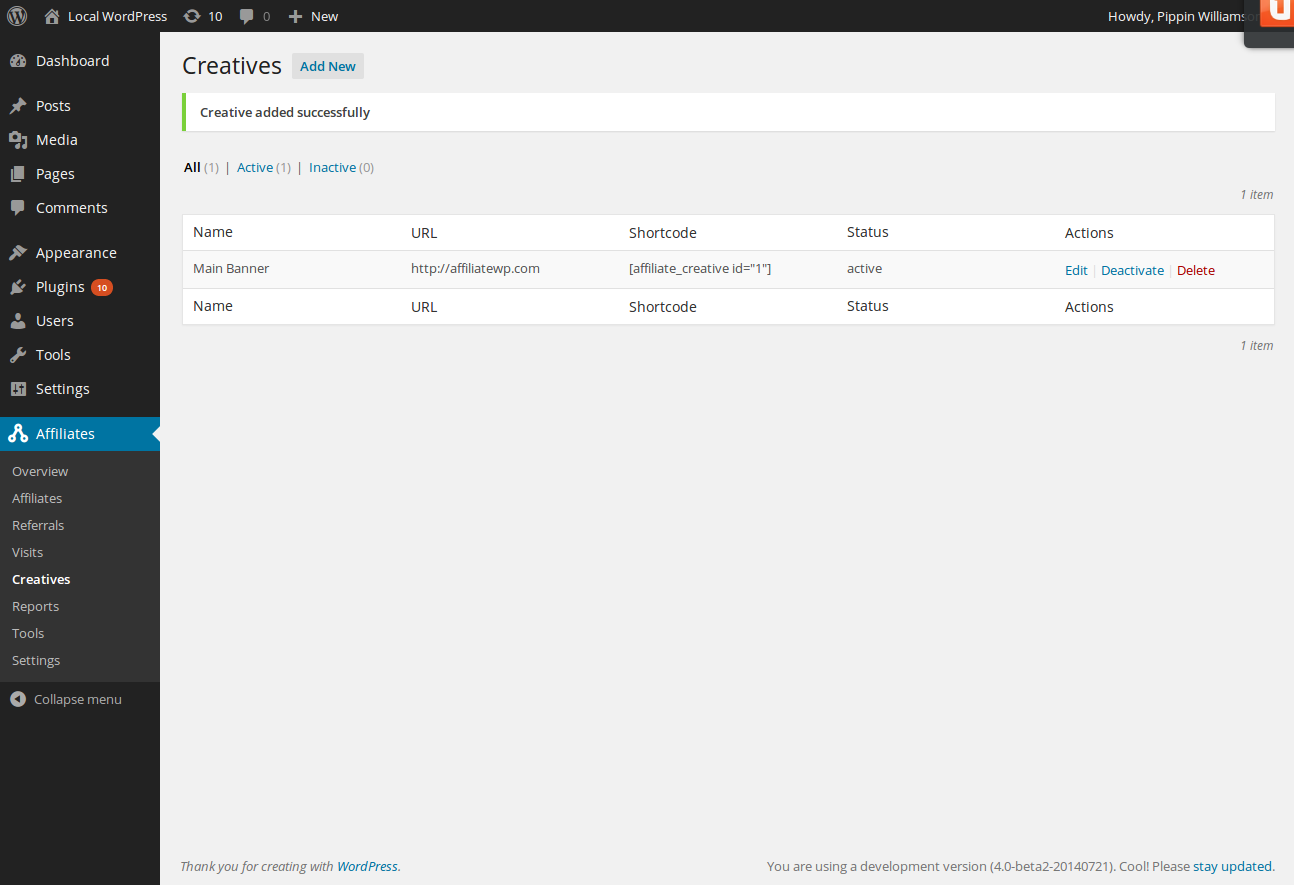
From the Creatives list, you can view the pertinent details of each Creative, change the status, and even view the shortcode needed to display the creative on any page of your website.
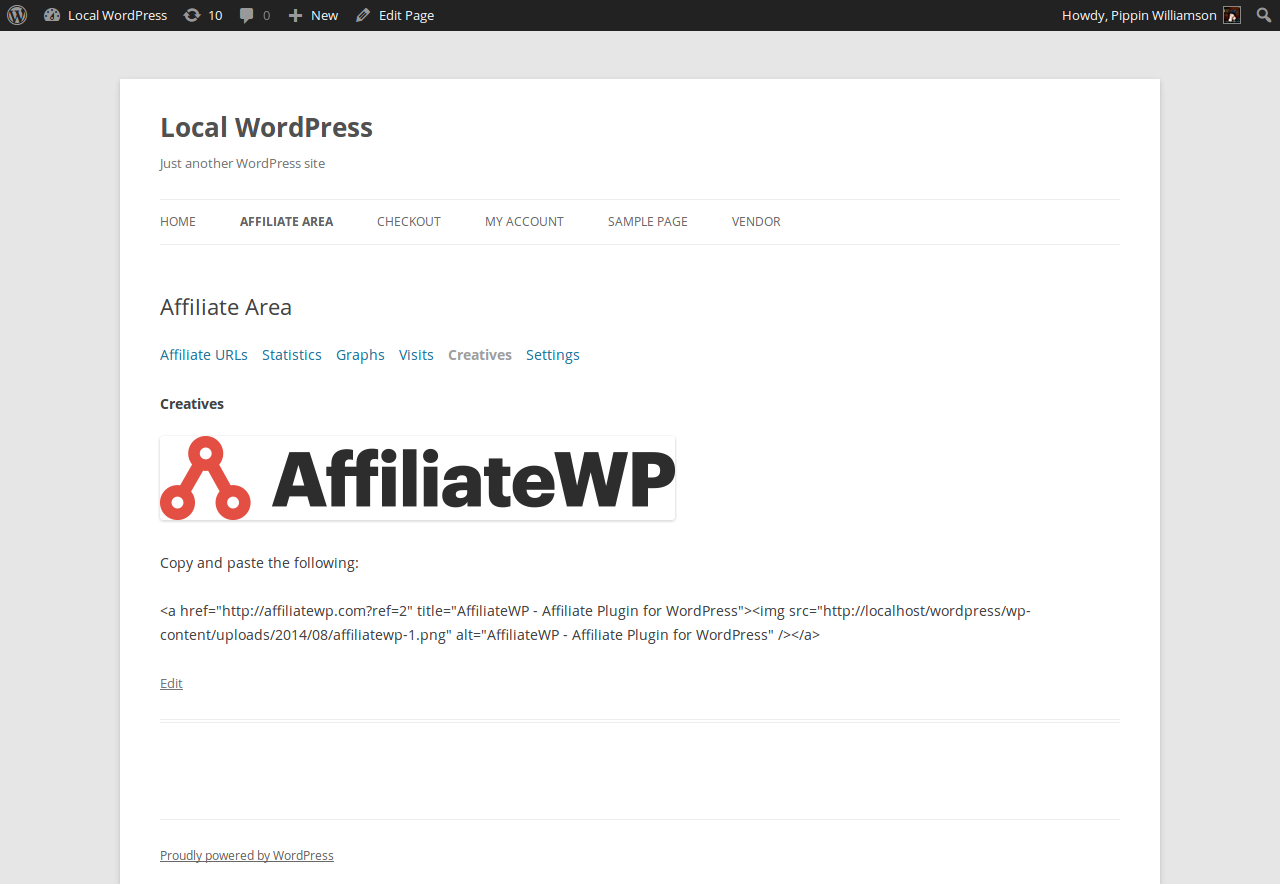
Creatives that have a status of Active will be automatically listed under the Creatives tab of the Affiliate Area on the front end of your website, meaning they are visible and available for use by all affiliates:
There are two shortcodes related to affiliate Creatives that you can use as well:
- [affiliate_creatives] – this will display a list of all active Creatives
- [affiliate_creative] – this will display a specific creative designated by the id=”x” parameter
Take a look at our doc on best practices for affiliate creatives and banners for some useful tips on providing your affiliates with banners and creatives that align with your website branding.
Affiliate URLs
Listed below are all the variations of a referral URL that your affiliates can use to promote your products and services. The ref is the referral URL variable and can be easily modified from the settings page.
Example: if your affiliate’s WordPress username was john, and their affiliate ID was 1, the following URLs would work:
- site.com/ref/1
- site.com/ref/john
- site.com/page/ref/1
- site.com/page/ref/john
- site.com/?ref=1
- site.com/page?ref=1
- site.com/?ref=john
Showing pretty URLs to your affiliates
A pretty URL is a website address or link that is easier for visitors to read, and includes words which describe the content of the webpage. Pretty URLs are free from query strings, and are considered to be more search engine friendly as they “describe” the content of each page to search engine crawlers.
AffiliateWP allows you and your affiliates to use various affiliate referral URL structures to direct potential customers or leads to your website. These URL types are based on WordPress’ standard URL structures. All affiliate URLs work out of the box, including pretty URLs. Below are some examples of pretty affiliate URLs:
- site.com/ref/1
- site.com/ref/john
- site.com/page/ref/1
- site.com/page/ref/john
Show pretty affiliate referral URLs in the Affiliate Area
If you would like to encourage your affiliates to use a pretty URL format when sharing their affiliate referral links, you can choose to show a pretty URL in the Affiliate Area. Simply enable the “Pretty Affiliate URLs” option in the Affiliates → Settings → General tab and save the changes.
Adding, Editing, and Deleting Referrals
This article details how to edit, delete, and add referrals in AffiliateWP, using the available interface within AffiliateWP’s settings.
Referrals can be added, edited, or deleted by navigating to Affiliates → Referrals:

Once you’ve clicked on Referrals in the above menu and are on the Referrals page, follow the relevant instructions below:
Manually adding referrals
On the Referrals page, referrals can be manually added by clicking on the Add New Referral button:
 Once you’ve clicked Add New Referral, you will be presented with a form that looks like this:

In the Affiliate field, begin typing the name, email or login name of the affiliate you’d like to credit this referral to. A list of affiliates will be shown matching the partial name you have entered:

Simply click on the affiliate that you are creating this referral for.
Define the rest of the available fields you’d like for the new referral. If you’d like to connect this referral to an existing purchase or membership, see below. Once you’ve completed populating this information, click on the Add Referral button.
Editing existing referrals
To edit an existing referral, on the Referrals page, click on the Edit link for the referral which you’d like to edit:

On the edit page for that referral, adjust the fields you’d like, and then click the Update Referral button:

Linking referral data to order information
When adding or editing a referral, you can specify various types of information about the referral:
Amount
Here, you can define or adjust the amount of the referral. This number follows the referral type set in AffiliateWP settings (either a percentage, or a flat/fixed amount).
Referral Type
Added in version 2.2, this field is used to define the referral type: Sales, Opt-In, or Lead.
Description
This field is used to describe the referral.
Reference
The reference is most frequently used to note the transaction ID (or order number) of a referring sale which you’d like to associate with this referral. For example, if you wish to link a referral with an existing order within WooCommerce:
Enter the WooCommerce order number in the reference field, and enter woocommerce for the Context field (described below), and then you can click through from this referral, directly to the WooCommerce order information page.
Context
The context typically defines the payment system used to process the transaction. Commonly-used contexts are the name of the commerce plugin in use, such as woocommerce, gravityforms, or edd, for example.
Custom
Do not put anything in the custom field as it is only used for recurring referrals. If you need to enter a recurring referral manually, please see this document: Manually Creating Recurring Referrals
Status
The status determines whether or not the referral is paid, pending, or rejected. You can specify which by selecting the desired option from the dropdown:

Deleting referrals
To delete a referral, on the Referrals page, click on the Delete link for the referral which you’d like to delete:

Creating a recurring referral
Need to create a recurring referral? We have a dedicated set of documents for that:
Manually Creating Recurring Referrals
Searching Referrals
To search specific referral data such as a reference number or description entry, click the Help tab at the top-right of the Referrals screen, then when the help options appear, click on Searching Referrals on the left side of the screen. The list shown provides several ways referrals can be searched:

For example, to search the Reference column for an order id of 1234, you would enter this in the search field: ref:1234
Credit Last Referrer
The Credit Last Referrer option allows you to credit the last affiliate who referred the customer. To enable, check the box located under Affiliates → Settings → General, as shown in the screenshot below:

What does it do?
So, let’s say that we have an affiliate named affiliate_1 and affiliate_1 shares a link. Now customer_1 clicks on the link to a product, but they never make a purchase. A second affiliate named affiliate_2 shares an affiliate link that customer_1 clicks on and then makes a purchase. affiliate_2 will receive the commission from customer_1 over affiliate_1.
Reports
This article functions as a guide to the Reports features available within AffiliateWP.
AffiliateWP reports offer a wide range of data, and you can view graphs of referrals over time, easily seeing your site’s affiliate marketing performance, as well as a detailed breakdown of how well a specific affiliate is performing, information on payouts, campaigns, visits, and referrals.
Overview
The Reports Overview screen is located in Affiliates → Overview, and shows a brief collection of statistical data:

The meta boxes shown on the Overview screen can be customized as desired.
Looking for much more detailed information? Read on to learn about the complete Reports section of AffiliateWP.
Let’s take a look at each of the five tabs available within the Reports section:

Filters
In each tab, there’s an option to filter data by a specific affiliate*. To filter the data by an affiliate, enter the affiliate name in the input field:

*In the Affiliates tab, the filter instead provides the ability to filter by date. Select the desired date range to see data for this affiliate during that time period.
Quick Stats
In each tab, helpful statistical data is available in the Quick Stats section:

Reports tabs can also be customized to your liking. Each meta box can be re-arranged to a custom location within that tab:

Trends
The Trends section shows a graphical representation of your referrals, affiliates, payouts, visits, or campaigns activity, depending on the active Reports tab. The graph will update based on the data which is filtered using the Filter option at the top of each Reports tab.
For each tab, the graph can be filtered to show the following date ranges:
- Today
- Yesterday
- This Week
- Last Week
- This Month
- This Quarter
- Last Quarter
- This Year
- Last Year
- Custom – (Select your own date range)
Referrals
You can view the following information on the Referrals graph:
- Paid Earnings
- Paid Earnings This Month
- Paid Earnings Today
- Unpaid Referrals
- Unpaid Referrals This Month
- Unpaid Referrals Today
- Unpaid Earnings
- Unpaid Earnings This Month
- Unpaid Earnings Today

Notice the color-coded lines for each type of referral: Unpaid, Pending, Rejected, and Paid:

This helps provide a quick visual indicator for different referral statuses, without needing to use several separate graphs, so you can easily get a glimpse of comparative data right away.
Affiliates
Affiliate data shown in the Affiliates tab includes:
- Total number of affiliates (all-time)
- New affiliates (per selected date-range)
- The highest converting affiliate (per selected date-range)
- The top-earning affiliate (per selected date-range)
Included in the Affiliates tab is affiliate registration data, filterable with the same options as other Reports section graphs. The Trends graph shows affiliate registrations by the selected date range.

Visits
AffiliateWP also records visits, which are visits to your site that are made using a referral link, but do not necessarily convert into a referral. The available data for visits are:
- Number of visits
- Successful Conversions
- Conversion Rate

Similar to the color-coding within the referrals graph, the visits graph shows converted visits as yellow, and unconverted visits as blue, which is also indicated in the top-right of the graph:

Payouts
Data for payouts is available in the Payouts tab, and includes the following information:
- Earnings generated
- Earnings paid (all-time)
- Earnings paid (by selected date range)
- Total earnings generated (by selected date range)
- Average payout amount
- Total payouts count
- Average number of referrals per payout
Like the other Reports tabs, payout data meta boxes are customizable, and a visual Trends graph is also included:

Campaigns
Campaign data can be viewed in the Campaigns tab. Learn more about campaign tracking in AffiliateWP here.

Need to export data you’re seeing in the reports section? If you need to export your affiliates, referrals, payouts, or visits, AffiliateWP has that covered:
Paying your affiliates
When it comes time to pay your affiliates their referral earnings, there are several ways you can go about it. Find out how to pay your affiliates below.
Paying your affiliates via our Payouts Service
AffiliateWP includes a fully integrated payouts service that makes it incredibly simple to pay affiliates in more than 30 different countries. Affiliates receive payments directly to their bank accounts in as little as 3 days.
Learn more about using the Payouts Service here.
Paying your affiliates via PayPal or other online mass payment system
On the Affiliates → Referrals page you can click the Pay Affiliates button to be taken to the Pay Affiliates screen and you can choose your Payout Method as Manual Payout. This will take you to the Preview Payout Request screen which will allow you to click the Generate CSV File button to generate a CSV file of affiliates and their collective totals.
The CSV file generated will consist of the email addresses, the collective amounts, and the currency for all affiliates that have unpaid earnings for the date range specified.
This file has been specifically formatted for the Mass Payment option provided by PayPal and Skrill, as well as other similar systems. If you are using a mass payment system, the email address associated with an affiliate’s payment account can be set from their Edit screen.
When you upload this CSV file, the online payment service will take the amounts and email addresses stored in the file and create a mass payment.
You can also pay each affiliate individually through PayPal if you wish.
You can use this payment method with any license level.
Note: When using the Generate Payout File button, all referrals in the specified date range will be automatically marked with Paid status.
Paying your affiliates via bank transfer
If you wish to pay your affiliates directly into their bank account via Bank Transfer, this will need to be done manually by you through your bank (this process doesn’t take place through AffiliateWP). You simply need to communicate to your affiliates that they will be paid via bank transfer, and they will need to provide you with their bank account details so you can transfer money to their account.If your bank supports mass payments, you can export the CSV payout file (as mentioned above) and upload it to your bank’s online banking portal. Exporting this file will automatically set all Unpaid referrals to a Paid status.If your bank doesn’t support mass payments, you can make individual payments to your affiliates through your bank. You could set each affiliate up as a saved payee to help streamline this process for when you need to pay your affiliates. When you have made these payments to your affiliates, you can then manually set the referrals which have been paid to a Paid status on the Affiliates → Referrals page. You can use this payment method with any license level.
Paying your affiliates with the PayPal Payouts pro add-on
If you use PayPal for paying your affiliates, and your account has the MassPay/Payout API enabled, our PayPal Payouts add-on makes it incredibly easily to process payouts for your affiliates from within your WordPress dashboard with just one click.
The PayPal Payouts pro add-on is only available with a Professional license (or historical Ultimate license). If you have a Personal or Plus license, you can pay your affiliates through PayPal using the option above, or you can upgrade to a Professional license from your account page to get access to the PayPal Payouts pro add-on.
Generating payouts with PayPal Payouts
You can generate a payout for a single affiliate, or pay in bulk as needed. To do so, visit the Affiliates → Referrals page and click the Pay Affiliates button to be taken to the Pay Affiliates screen:

Choose your Payout Method as PayPal and enter your criteria for the affiliate’s name, Start / End Dates, or Minimal Earnings if desired, then click the Preview Payout button at the bottom of the screen:

From there, click the Submit Payout button and the amount will be transmitted to the affiliate’s PayPal account:

Minimum requirements
There are only two requirements to use AffiliateWP:
- WordPress 4.4+
- PHP 5.3+
Remove the affiliate registration form from the Affiliate Area page
By default, when the Allow Affiliate Registration option is enabled in AffiliateWP’s settings (Affiliates → Settings → Misc), an affiliate registration form and an affiliate login form will appear on the page you have created for your Affiliate Area (i.e. yoursite.com/affiliate-area).
You may want to keep the affiliate login form visible on the affiliate area page, but place the affiliate registration form on another page on your website using the [affiliate_registration] shortcode. This can be done by simply going to the Affiliate Form Settings – Affiliate Area Forms section in Affiliates → Settings → General, and change your selection to only display the affiliate login form.